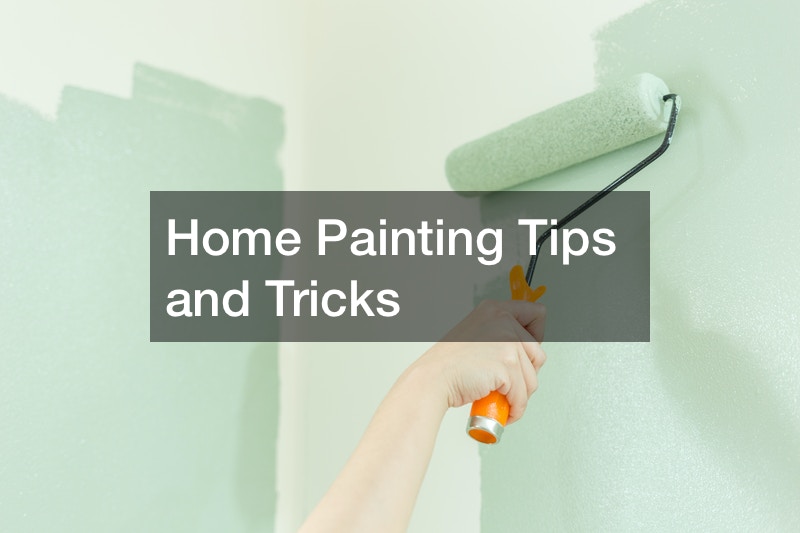
One of the most enjoyable ways to add character and value to your home is through painting. Hiring affordable house painters is a good idea if you cannot set aside the time and effort required for a DIY project. You will, however, incur more costs for engaging a professional painting company.
You can use a few house painting tricks if you want to save on such costs but still achieve your desired look. In this article, we examine these tricks in detail while showing you how to maximize them for your desired finish.
Prep the Surfaces

Surface prepping is one of the common home painting tips and tricks. Prepping the surfaces before painting is crucial in ensuring the beauty and durability of your final look. Cleaning your surfaces using a tack cloth or dumb cotton garment is the first step in prepping. Such cleaning removes any dirt particles that may contaminate your surfaces and prevent your paint from effectively adhering to them
Tack clothes are suitable for small surfaces like cabinets, windows, and doors. Larger surfaces like walls will require you to clean them using soapy water and a soft sponge. Softly rub the soaked sponge from the bottom to the top of your walls to eliminate any smears and debris.
Scraping your walls is also important when prepping your surfaces for house painting. You can scrape off any loose paint, glue, texture, and debris using a putty knife to ensure that your walls are even. It would also help if you pulled out any wallpaper before painting. Other important prepping techniques include sanding, crack filling, stain priming, and trim taping.
Purchase High-Quality Tools
Using high-quality tools is a non-negotiable requirement for an interior house painter looking to achieve a great finish. Some of the high-quality tools you require for a home painting project include:
- Roller Covers- Roller covers are the best house painting tools for large interior surfaces. High-quality roller covers prevent any fuzz or lint from creating bumpy walls .
- Hand brush- Use a hand brush to paint the areas of your interior surfaces that a roller cover cannot reach. Such areas include wall edges and trims. You can also use a brush to add artistic details that cannot be roller painted or sprayed .
- Latex Gloves- Wearing latex gloves while painting will keep the paint from staining your hands. Such staining is more common in oil-based paints than in water-based paints. You can use nitrile gloves if you do not have latex gloves
- Blue Tape- Blue tape is the perfect material for taping off the surfaces you do not want to paint. Such surfaces include baseboards, switches, door frames, and window trims. You can also use blue tape to remove the lint from a new roller cover
- Drop Cloth- Use drop cloths to prevent any paint from getting onto your furniture, floors, carpets, and fittings by covering them. Use extra sheets or masking films to do the covering in the absence of drop cloths
- Spackle and a Spackling Blade- Use spackle to fill up any holes, cracks, and crevices on your wall. Spackle is the perfect filling material because it is quick-drying. It would help if you had a spackling blade to apply the spackle onto your wall. Choose a spackling blade depending on the size of the holes on your wall
- Ladder- A ladder will give you the necessary elevation to paint higher walls and ceilings
- Caulk Gun- A caulk gun will come in handy if you want to fill the grooves between your windows and walls
Choose the Right Type and Quality of Paint

One of the vital home painting tips and tricks is having high-quality paint. The difference between high-quality and low-quality paint is solid pigment concentration. High-quality paints contain more solid pigments than low-quality paint. Therefore, you must repeatedly apply low-quality paint for enough pigment to adhere to your surfaces.
Latex paint is regularly used in residential applications because it is easy to clean. You only need soapy water and a sponge to clean off any dust and grime from a latex-painted surface. Latex paint is also suitable for home applications because it dries up within two hours of application. Applying latex paint will also prevent mold and moisture from penetrating your surfaces and causing damage.
Areas with a high moisture concentration require oil-based paint application for adequate protection. Such areas include basements, kitchens, and bathrooms. You can also apply oil-based paint on high-impact areas like cabinets, trims, and floors. Oil-based paint has a strong smell and can take up to eight hours to dry. You, therefore, need adequate ventilation to quicken the drying process and reduce the pungent smell when using this paint.
Choose the Right Painting Technique
Spray painting is the best technique to use on large interior and exterior spaces that do not require accuracy. If you are doing a full kitchen and bath remodeling project, spray painting will provide you with great results in the shortest time. It would help if you also used spray paint when renovating a basement, garage, play set, or sunroom. Such spaces are perfect for spray painting because they do not require a detailed approach.
Rolling is the best painting alternative for interior areas needing a thicker coat of paint with greater consistency. Such places include the living room, bedrooms, kitchen, ceilings, and bathrooms. Roller painting is also perfect if you have a large project you cannot complete within a day. Unlike spraying, rolling allows you to paint in intervals without compromising your desired quality.
Brushing is ideal for small areas that require more detailed painting. Such places include window trims, edges, and corners. You can also use brush painting for large areas needing an extra artistic touch. When brush painting, ensure you have the right brush for the right job. Artists’ brushes add detail, while painters’ brushes apply primer on large surfaces. Painters use synthetic brushes for water-based paint and natural brushes for oil-based paint.
Store your Roller and Brush Appropriately

A large home painting project will likely take more than a day to complete if you do it yourself. You, therefore, need to know how to keep your roller and hand brush in good condition at the end of each day. You shouldn’t clean your roller cover and hand brush after each working day. Cleaning such tools before storage is tedious because you may need to do it repeatedly to get rid of the paint completely.
One of the best home painting tips and tricks to preserve the integrity of your hand brush and roller cover without cleaning them is freezing them. Covering such tools with a plastic bag before putting them in the freezer is advisable to prevent contamination. Please do not use your frozen roller cover and brush to paint unless you have given them adequate time to thaw. You can also preserve your roller cover and hand brush by keeping them in air-tight plastic bags at room temperature
Mix Paint
Despite having the same color, paint shades may vary from one can to another. Painting from a new can before completing a surface may create an apparent difference in shades. Mixing different paint cans in a central bucket before starting to paint will ensure you achieve consistency in shades.
This process of mixing is commonly called boxing. If you cannot estimate how much paint you need, mix more than enough and pour any leftover back into the cans. It will also help if you use a roller screen instead of a roller tray for large projects. Loading your roller with paint using a screen is one of the best home painting tips and tricks that will save you more time than tray-loading.
Ensure Dryness of Surfaces before Carefully Removing the Blue Tape
The quality of your final paint finish depends on how skilled you are at removing the blue tape from the trims. Wait for at least a day for the paint to dry is one of the common home painting tips and tricks. Use a knife to cut the paint film between the surface and the tape to avoid damaging the coat. You can then carefully pull out the blue tape from hidden areas to more conspicuous ones.
Paint the Trims before the Walls and Ceiling
One of the main home painting tips and tricks used by a painting contractor is painting the trims first. The main reason for this painting order is that trim taping is much easier than wall and ceiling taping. Painting the trim first will guarantee you a smooth finish without having to be neat. Any trim paint that gets onto the walls can always be covered when painting the walls. Wait for at least a day for your trim to dry before taping it off. You can then paint the ceiling and finish with the walls.
Maintain a Wet Edge When Roller Painting
Maintaining a wet edge when roller painting is crucial because it enables you to prevent the formation of lap marks. Lap marks are uneven strips formed when you roll over partially dry paint. Lap marks are conspicuously different from the intended paint coating in sheen and color. Low-quality paint and poorly prepping your surface can also result in lap marks.
A wet edge on your roller ensures your paint strokes overlap each other before any drying can begin to occur. The key to maintaining a wet edge is to start your painting near a corner. Roll the paint up and down the entire wall before slightly moving on to the next stroke. You can re-do a previous stroke if necessary to eliminate any unevenness. Ensure you constantly load your roller with paint to prevent dryness.
Replace Tiles with Paint
One of the most common home painting tips and tricks is replacing tiles with paint. You can use this trick if you do not have the funds to purchase new tiles for a bathroom remodeling project. Bathroom remodeling can be done by making just a few simple but effective changes. Applying chalk paint on your floor is the first step in such a bathroom remodel. This paint will act as a canvas on which you can create your desired design. You can then use a stencil to apply your preferred letters, numbers, symbols, words, or patterns to the floor.
Prime Wall Patches
Your freshly painted surface may look blemished if it previously had holes and cracks that you spackle-filled. This blemish expresses itself in gloss inconsistencies on your patched areas. Blemishing occurs when the porous spackles absorb the paint, creating a flat effect on the walls. You can correct such blemishing by coating the patches using a primer. Priming these patches will eliminate the dull effect sealing the areas through which paint is absorbed.
Cover Kitchen Countertops with Rosin Paper
One of the home painting tips and tricks you can apply to prevent the messy nature of kitchen cabinet painting from affecting your countertops is covering them with rosin paper. You can source such paper from cabinet painting business experts at an affordable price. A standard-size rosin paper roll is all it takes to keep your countertops from being stained with paint. After finishing your painting project, store the rosin paper for future use
Use Appropriate Colors

Knowing the right paint color for each space is one of the essential home painting tips and tricks. Renovating a basement will require you to paint surfaces with rich colors that do not require a lot of natural light to stand out. You can use lighter shades of paint for surfaces directly exposed to natural light. Soft hues are more appropriate for such areas because they add character to the room without excessively reflecting the light.
It would also help if you did not use too many colors in one room. A professional interior house painter will advise you to have a dominant color within any given space. You can then apply complementary secondary colors and accents that add to the room’s character.